Practical Coloring Tips

Have you tried applying some of the scrapbooking-coloring mash up tips we shared previously? Well, talented colorist Robin Petersen Wilson‘s back. Here are some practical coloring tips she shared with us that can help make your coloring look more polished.

Four Tips To Make Your Coloring Go From Fair to Fabulous!

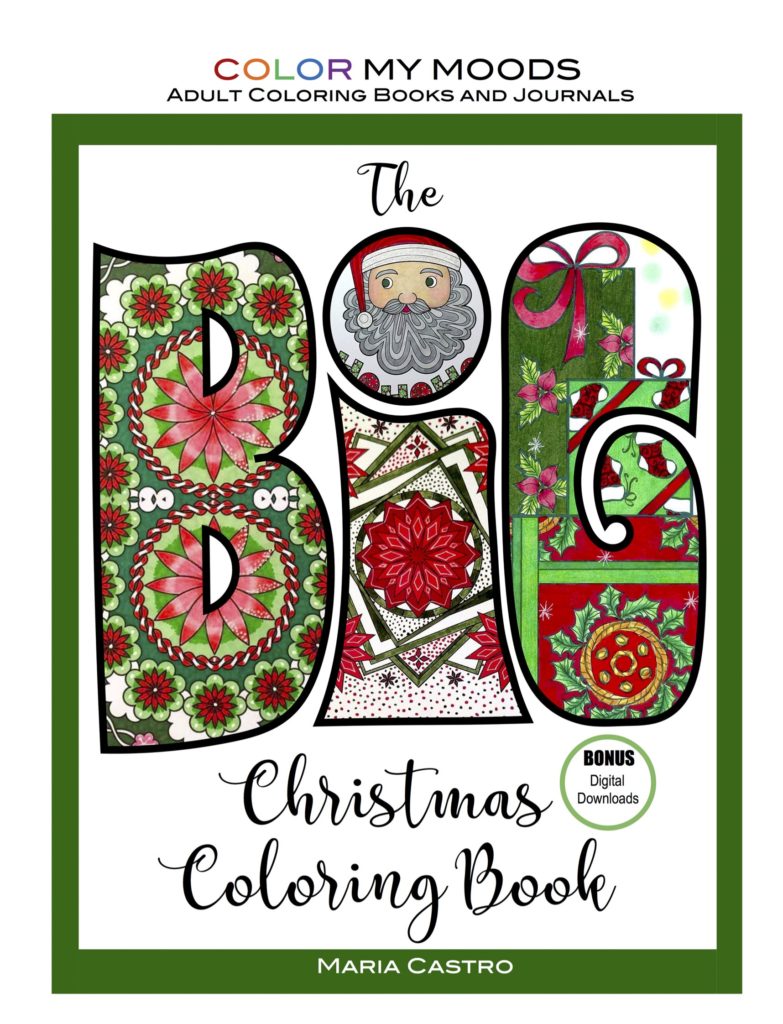
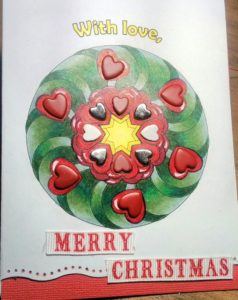
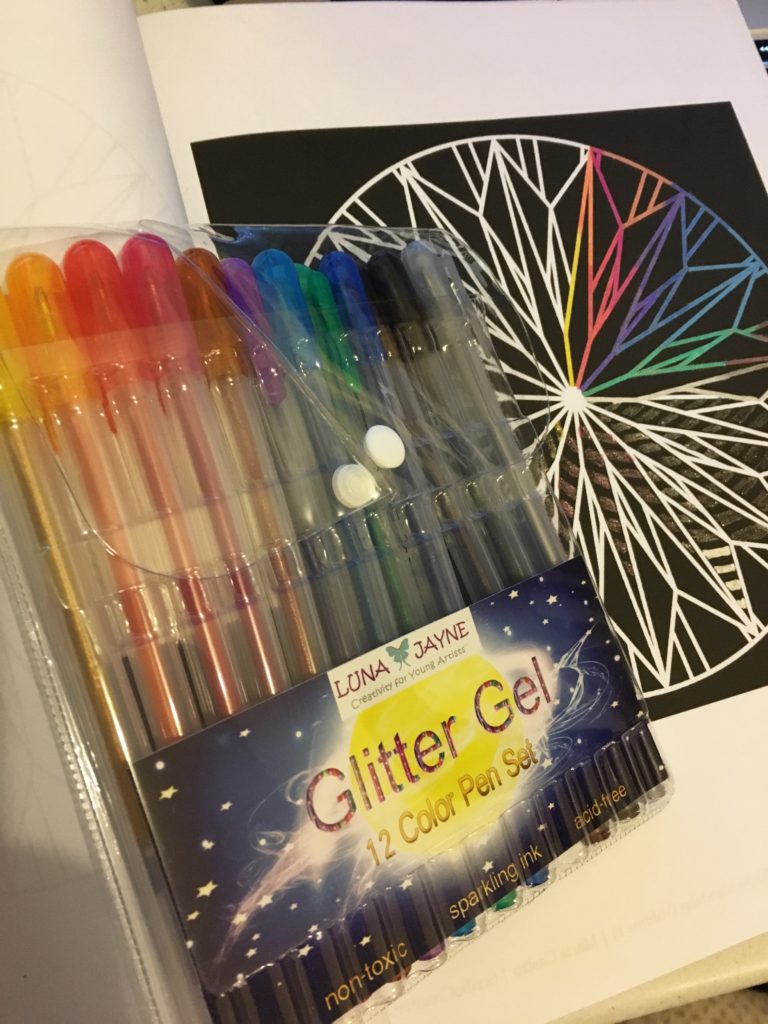
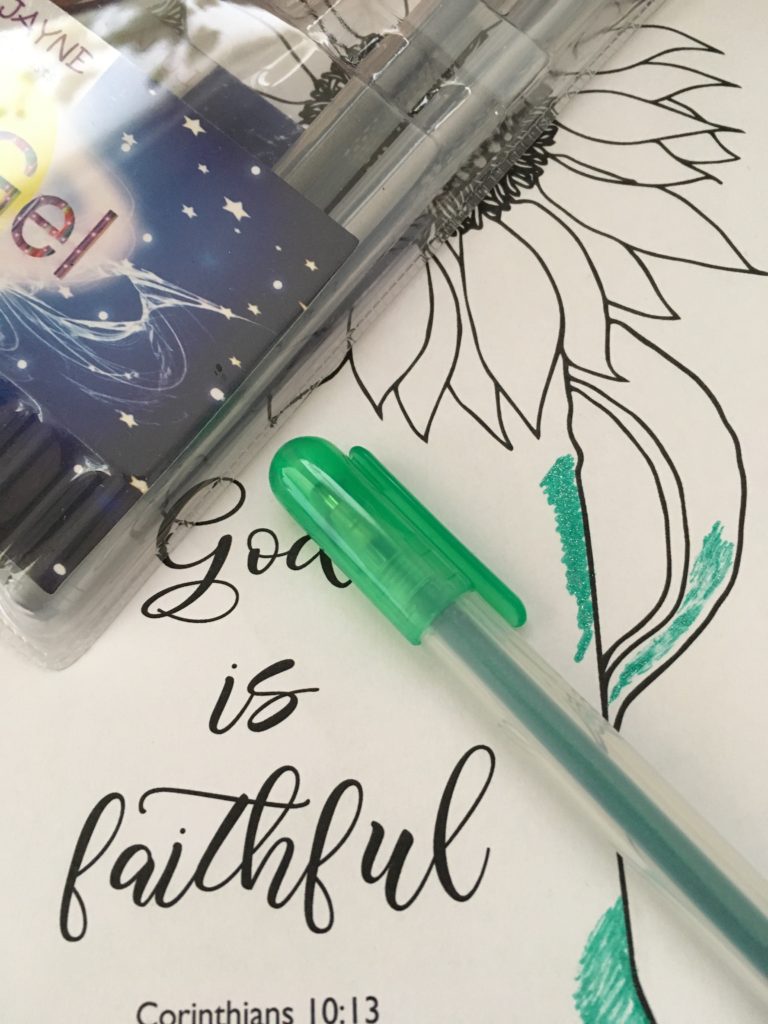
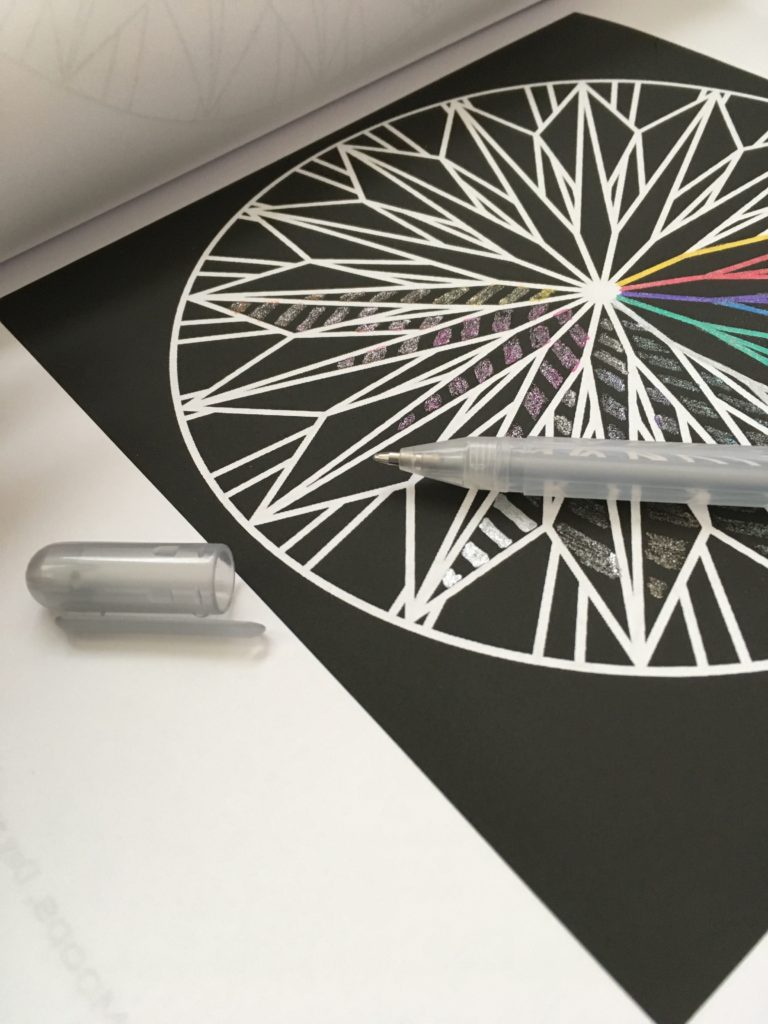
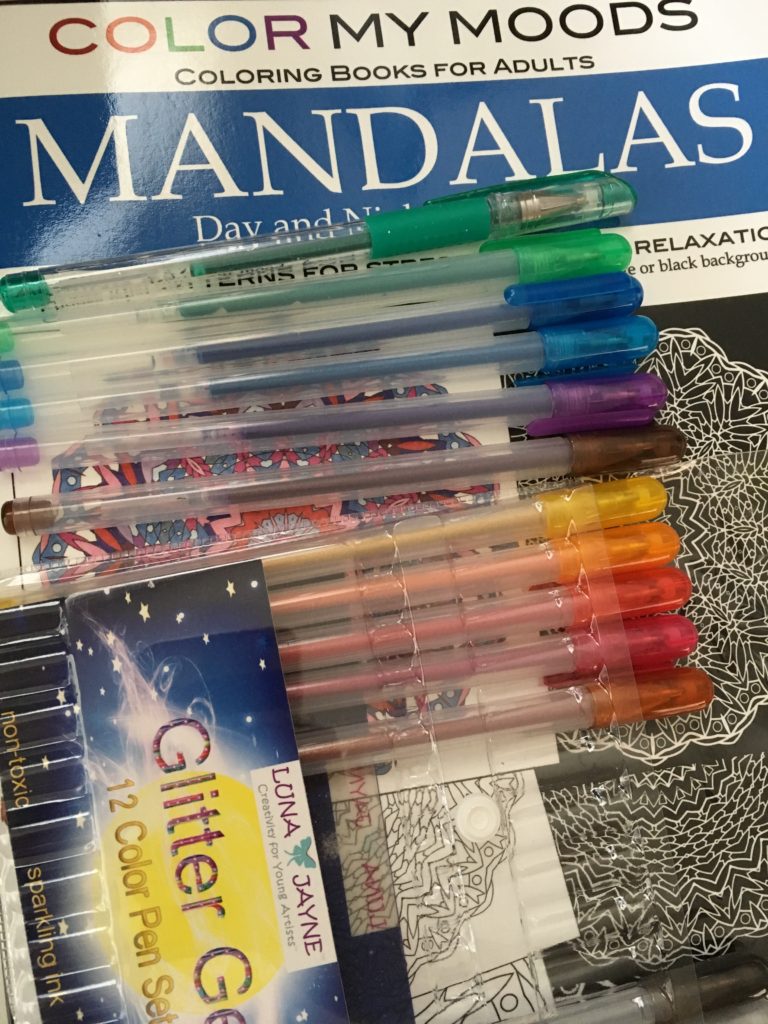
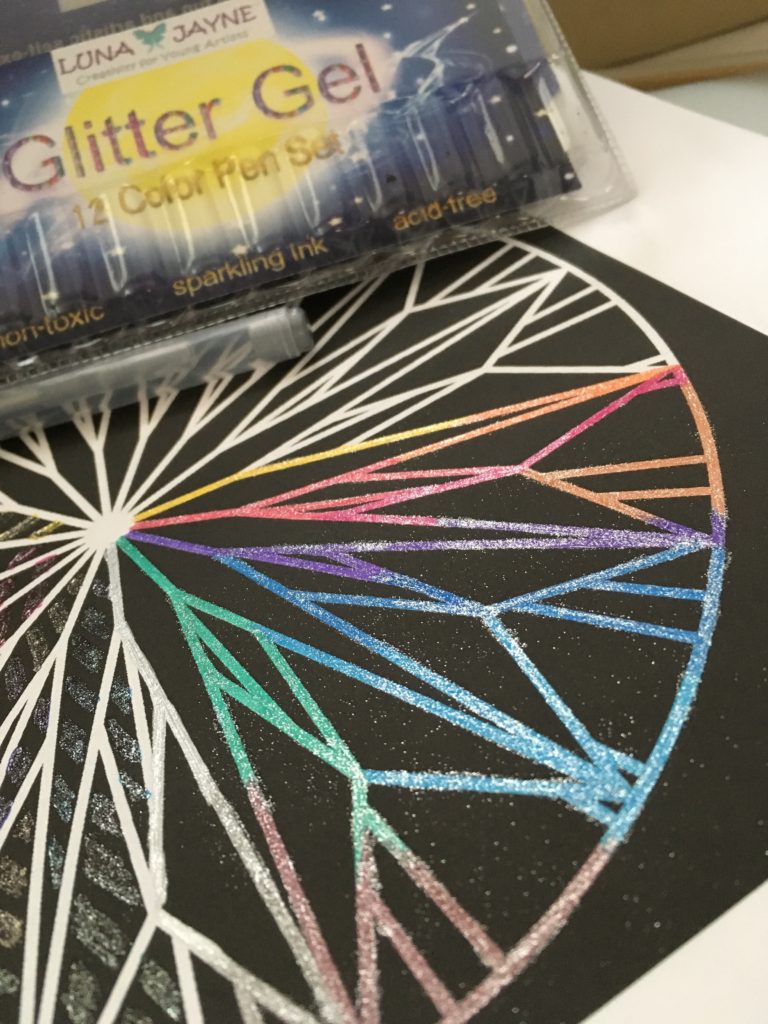
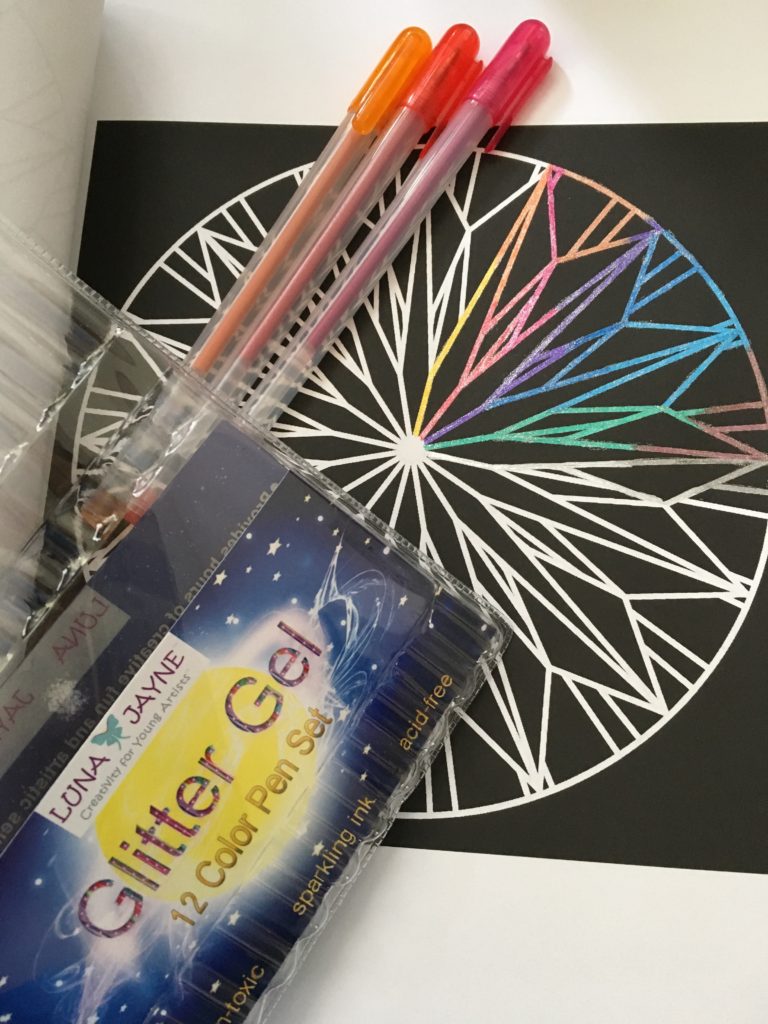
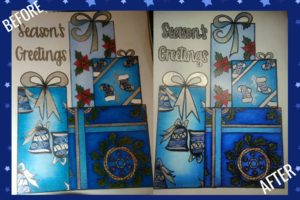
1. Think outside of the box – Or lines in this case. Have you ever tried coloring on the black print/line art itself? Silver or white gel pens work well for this. You can come up with some pretty sophisticated look like these pages from The BIG Christmas Coloring Book and Blessings in Bloom Gratitude Coloring Journal.

The BIG Christmas Coloring Book by Color My Moods
Color My Moods Blessings in Bloom Gratitude Coloring Journal

2. Line work – Speaking of line work, when coloring, your black lines will fade or get covered by your medium.

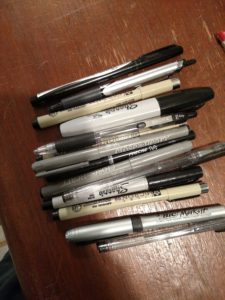
Robin always goes back over her lines with a black medium (pen, colored pencil or marker) to make them stand out again.  She has a collection of black media that she uses just for this.

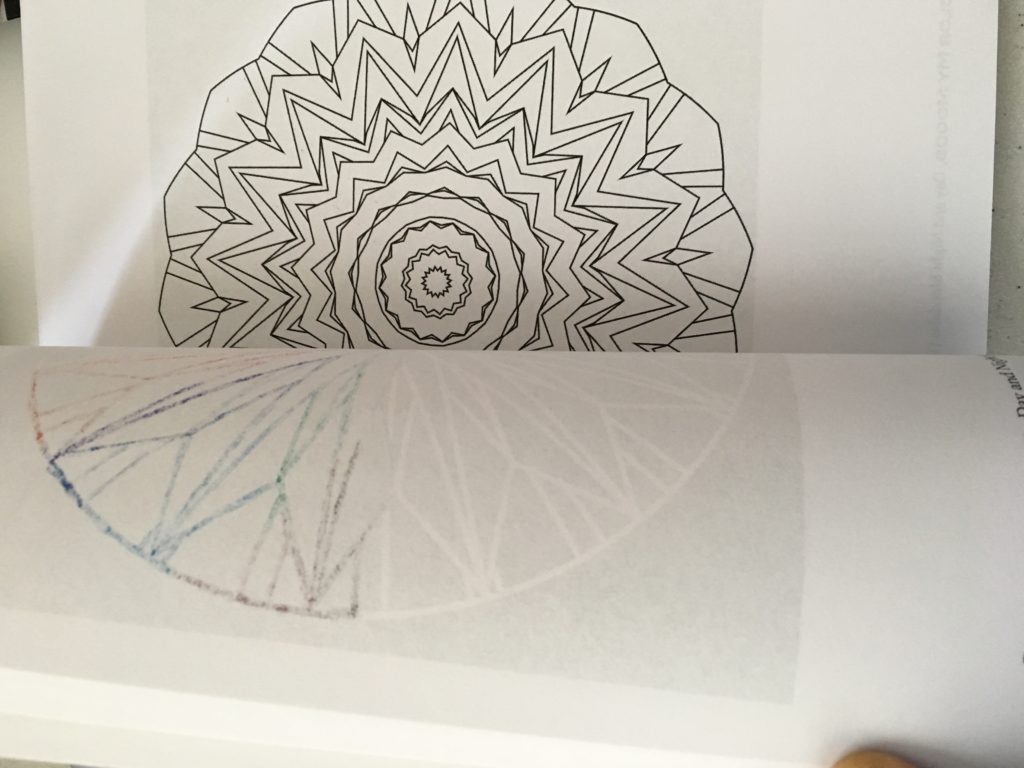
Going over the line work gives the picture more detail and looks more finished. The sample pages below from The BIG Christmas Coloring Book shows that the devil’s in the details.

fullsizerender

Robin uses several media depending on the width of the line. On the sample page, the really wide ones are colored pencil, going down to a .05 pen.

You don’t want to change the drawing, just enhance what has faded from your coloring.

15493812_10212039625887591_8090687657093655225_o

3. Lighting – You may think you have great lighting for your coloring projects until you invest in a day light lamp.

Robin says it will literally make a night and day difference in your coloring.  They are not cheap so don’t forget to use you coupon.  Michaels has a 50% off one that expires today. Amazon has a few as well. Robin has Ottlite.

15440448_10212039626327602_6792437761860648377_o

4. Reading Glasses – Who would have thought that this would be included in your coloring tools list? If you’re over 40 years old, chances are your near focus isn’t as good as it used to be.

Robin advises going to the Dollar store and picking up a pair or  five (they are only one dollar ?) of the 2.75 or 3.0 reading glasses.

These will help when you are blending, doing small spaces or making sure you have complete coverage on your coloring.

She said that you will see that your blending is smoother and you stay in the lines better. This also makes working on your line work go much faster.

vzm-img_20160401_103747
Thank you to Robin’s pet Raggs for modeling her reading glasses. 🙂

We hope these four tips elevate your coloring from fair to fabulous ?.

Let us know what you think. And if you try any of these, we would love to see your colored pages. Tag Maria Castro or add #scribocreative #colormymoods.

Maria Castro of ScriboCreative.com is a participant in the Amazon Services LLC Associates Program, an affiliate advertising program designed to provide a means for sites to earn advertising fees by advertising and linking to Amazon.com.

The BIG Christmas Coloring Book is here!

It’s here and it’s BIG!


The BIG Christmas Coloring Book

Amazon (Paperback) – http://amzn.to/2h6CwqH

CreateSpace (Paperback) – https://www.createspace.com/6775696

Gumroad (PDF) – https://gum.co/Ziviw

Video preview – https://youtu.be/Fo8EXvPVPic

Fifty festive original artwork featuring holiday favorites like nativity scene, Santa, Christmas tree, angel, bells, stocking, seasonal mandala and patterns and more.

Single-sided pages make it suitable for different media, including colored pencils, markers, gel pens, pastels, crayons, and more. We recommend using the extra blank sheets provided as blotter pages to minimize bleed-through.

Bonus Digital Downloads including coloring cards, bookmarks and more.

We hope you enjoy The BIG Christmas Coloring Book as much as we loved creating it for you. Will you please share your feedback by posting a review on Amazon? Check this page for product page links: https://www.scribocreative.com/products/.

Post your colored pages on social media with #scribocreative #colormymoods and you might just get a surprise from us. To connect with us, visit: http:// www.scribocreative.com/about/.

If you love The BIG Christmas Coloring Book, please check out our other coloring books and coloring journals on Amazon and other fine online retailers: http:// www.scribocreative.com/products/. PDF versions are also available.

For more coloring inspiration, monthly freebies and exclusive discounts, subscribe to our enews: https://www.scribocreative.com/enews/.

Special thanks to the colorists who shared their time and talent with us!

Front cover: Donna Pecoraro (Flowers and Gifts), Mara Lula (Santa and Flowers/Frames)

Back cover: Jane Adam (Christmas/Coloring), Donna Pecoraro (Peace and Nativity), Lisa Frey (It’s Cold Outside), Mara Lula (Stocking and Christmas tree), Kelly Taylor (Merry Christmas and Snowman)


Maria Castro of ScriboCreative.com is a participant in the Amazon Services LLC Associates Program, an affiliate advertising program designed to provide a means for sites to earn advertising fees by advertising and linking to Amazon.com.

Scrapbooking and Coloring

What did you do before discovering the world of adult coloring?

We’re learning that many colorists have been involved with another creative hobby before getting addicted to coloring. It’s scrapbooking for Robin Petersen Wilson.

We noticed the extra touches, sticker gems and such, that Robin uses to enhance her colored pages. We’re happy to share these step by step tips from Robin who has successfully married her love for scrapbooking and coloring. Enjoy!

MATERIALS:


img_20161128_0836042_rewind

Printable card/page – We have several coloring cards available in our Gumroad store. This particular set is available here: https://gum.co/ZogI

Tim Holt Distress embossing pad

Small paint brush

The Powder Keg pirate gold embossing powder

Aquamarine rhinestones by Kiesercraft

Prismacolor pencils in pc1079 blue violet lake, pc1026 grayed lavender, pc105 turquoise cobalt, pc928 blush pink.

  1. First color your your card as you desire, leaving any areas to be embossed blank.

img_20161128_0837439_rewind_kindlephoto-224449173

2. Take your embossing pad and press your finger down at the corner until some of fluid comes out of the side and sits on the casing. See arrow in close up.

img_20161128_0839475_rewind_kindlephoto-224573367

3. Dip you paint brush into this and paint the area you wish to emboss.

4. As you paint it will be clear but shiny, you can paint the whole card before you add the embossing powder as the embossing ink stays wet until it is heat set.

5. Pour your powder over the ink and shake it around a LITTLE, then pour the excess of the card.  Tap the card on the table to get any extra off that might stay behind.

img_20161128_0858116_rewind

6. Now you can take your paint brush and clean up you edges, as you can see from the top burst to the bottom I just took it and push everything gently back in to the lines.

7. Use your heat gun to process the embossing powder. It will turn shiny as it melts, remember to keep the gun moving so you don’t burn anything.  When I first tried I was worried about what the heat gun would do to the colored pencils but I saw no difference.

img_20161128_0845260_rewind

8.  Finished card closer up, After I was done, I took the cobalt turquoise and went around outside of each one to finish them off and added the rhinestones.  These already have adhesive one the so you just have peel then off and stick them on.

img_20161128_0920008_rewind_kindlephoto-337613402

What scrapbook supplies you have that you can incorporate into you coloring?

Here’s another example. Even just putting the simple heart stickers on this coloring card creates a lovely effect.

img_20161128_0920574_rewind_kindlephoto-227037087

Maria Castro of ScriboCreative.com is a participant in the Amazon Services LLC Associates Program, an affiliate advertising program designed to provide a means for sites to earn advertising fees by advertising and linking to Amazon.com.

It’s finally here — Color My Moods Blessings in Bloom Gratitude Coloring Journal!

The much-awaited Color My Moods Blessings in Bloom Gratitude Coloring Journal is finally here!

http://amzn.to/2exCxor

Color My Moods Adult Coloring Books and Journals presents Blessings in Bloom Gratitude Coloring Journal, perfect for thanksgiving and reflection.

Journaling and coloring are two of the most relaxing activities for stress relief and meditation. Blessings in Bloom combines both in a unique gratitude coloring journal that features:

  • All original, beautiful hand drawn illustrations that range from simple to moderately intricate to suit your coloring mood any day.
  • 11 elegant full-size coloring pages
  • 30 college ruled journaling pages, each with lovely floral drawings of roses, tulips, sunflowers, lilies, cherry blossoms, and more.
  • 5 lined pages for writing your favorite Bible verses.
  • 5 lined pages for listing your prayers and petitions.
  • 5 lined pages for contacts, events, websites, books, and other activities and resources that help you grow your faith.
  • 3 color test pages for trying different color combinations or coloring techniques.
  • Single-sided coloring and journaling pages make it suitable for different media including colored pencils, markers, gel pens, pastels, crayons, and more. We recommend using the extra blank sheets provided as blotter pages to minimize  bleed through.
  • Printing on one side only to allow you to use the other side for more notes and even doodles.
  • Plenty of space for note taking. Use Blessings in Bloom as a journal, notebook, diary, prayer journal or even as a 30-day planner.

We hope you enjoy coloring and writing in this journal as much as we feel blessed creating it for you. We would love your feedback. Please take a minute and leave a review: http://amzn.to/2exCxor.

Post your colored pages on social media with #scribocreative #colormymoods #blessingsinbloomchallenge and you might just get a surprise from us. To connect with us, visit: https://www.scribocreative.com/about/.

Continue to share your blessings as you bloom in God’s love.

*We feel blessed with all the support we received for this project:

Thank you to a wonderful team of colorists who helped us make sure this coloring journal is of the highest quality. Your feedback and support are priceless: Jane Adam, Becky Burns, Connie O’Keefe Edwards, Patricia Mexico, Faith Robeson, Elizabeth Zack Siegel, Elizabeth Wilkins as well as Jan Adams, Vermailene Joyce Barrios, Tracy Beattie, Melesa Eldridge, Lisa Frey, Grace Jugo, Pauline Latchem and Brittany Stephenson.

Mara Lula and Donna Pecoraro, your dedication and superior attention to details kept this project on track. Many thanks to you both!

Special thanks to Donna Pecoraro (Tulips), Robin Petersen Wilson (Cherry Blossoms) and Elizabeth Zack Siegel (Sunflowers) for the beautiful back cover coloring!

Thank you to an enthusiastic group of colorists who helped us test an advance copy of Blessings in Bloom: Christine Abbott, Pamela Bunker, George Calvin Dillabough, Tine Eintzen, Nancy Hopper, Rhonda Hutchins, Marry Kibbons, Deb Norman, Erica Thigpen,  Kelly Q, Maree Wakefield and Robin Petersen Wilson.

A big thank you to my dear sister for her wisdom and support.

Last but not the least, my deepest gratitude to my mom and my children’s special guardian angel who gave our family the gift of unwavering faith.


Maria Castro of ScriboCreative.com is a participant in the Amazon Services LLC Associates Program, an affiliate advertising program designed to provide a means for sites to earn advertising fees by advertising and linking to Amazon.com.

#blessingsinbloomchallenge

Today’s the start of Thanksgiving month. We especially like this time of year in our family because it allows us to gather and be grateful for all our blessings.

This week also marks the launch of our first coloring journal — the Color My Moods Blessings in Bloom Gratitude Coloring Journal. It’s a project inspired by the blessings God has given me — in particular, my loving husband and our four lovely children. If you haven’t joined our Facebook event yet, please click “Going”: https://www.facebook.com/events/1478911578790428/.

We will have more information about Blessings in Bloom all throughout the week. Today, we want to start our #blessingsinbloomchallenge. It’s not really a coloring contest although we would be featuring beautiful colored pages from our coloring journal. It’s more of a challenge to spread the spirit of gratitude in our daily lives.

Every day in the month of November, we’ll be posting an image you can share with families and friends. Let us know what you’re thankful for that day and tag someone who’ll do the same. Don’t forget to include #blessingsinbloomchallenge so we can track it on Facebook, Instagram, Twitter and other social media. We hope that this simple act would be a nice reminder of the countless blessings we sometimes take for granted.

Let the blessings bloom…

Luna Jayne Glitter Gel Pen Set Review Plus Coloring Tips

The first time I heard of Luna Jayne glitter gel pens was from Connie O’ Keefe Edwards who used it on one of our mandalas from Color My Moods.

Then I started noticing the beautiful colored pages on Facebook colored with Luna Jayne. I thought this would be a good product to review during our October “Black is Back” Challenge month. I’ve always liked the effect of gel pens on black background coloring pages.

ScriboCreative.com
The 12-piece Luna Jayne Glitter Gel Pen Pack and “Night” coloring page from Color My Moods Mandalas Vol. 1.

The set comes with 12 colors: yellow, orange, red, purple, blue, green, magenta-pink, sky blue, bronze, brown, gray and silver. After purchase, you’ll get a thank you email with a PDF attachment that shows how you can create 24 other colors for a total of 36 possible colors.

It comes packaged in a convenient lightweight plastic with a snap closure which should withstand regular wear and tear (but probably not my toddler).

Now, for the fun part. Here are the things I noticed coloring with Luna Jayne glitter gel pens:

  • They glide.

They are very light on the hands. It’s almost like you’re painting and it doesn’t feel “scratchy” like some of the other gel pens I’ve tried.

ScriboCreative.com
Luna Jayne glides unlike other gel pens that can feel scratchy or skip. This page is from our upcoming coloring journal “Blessings in Bloom”. Luna Jayne is the one with even coverage and no skipping.
  • You get good coverage with one stroke.

I usually have a scratch paper next to me when I’m coloring with my other gel pens. You probably do this too where you do several strokes to get the ink flowing. In some cases, no matter how many times you go back and forth, you still can’t get even coverage. You’ll be delighted with Luna Jayne because the ink flows right from the start. I was so surprised with this that I felt I needed to color faster to catch up with the ink flow.

Luna Jayne’s not supposed to bleed through (or have less bleed through) but I did experience some. I think it’s because I’m so used to going over a spot several times with other gel pens which is not needed with Luna Jaynes. Next time, I’ll work in smaller areas with single, more even strokes to prevent over saturating the page.

Scribo Creative Color My Moods Coloring Books for Adults
Don’t overdo it. A single stroke works fine to avoid bleed through.

Even coverage can also mean cost-savings in the long run. I imagine that Luna Jayne glitter gel pens will last longer since you won’t have to use as much to get your desired effect.

  • The colors are rich.

They’re vibrant and saturated. As you can see here, they’re fun to use on dark colored paper, in this case, on the Color My Moods “Night” version/black background page.

If you haven’t tried doodling on the black parts of the page itself, it’s a fun coloring technique to try with the Luna Jayne glitter pens. In this example, I just drew stripes in gradating rainbow colors.

The silver on the black part is so rich it almost looks like an opaque marker.

ScriboCreative.com
Luna Jayne glitter gel pens have rich colors. You can even color on top of dark-colored paper like the Color My Moods “Night” version.

I just wish the set came with white so I can create more of pastel colors by mixing with the other colors. A clear glitter pen would also be a great addition.

  • They feel sturdy.

The barrel of the pens feel similar to those of a high-end gel pen brand. I actually prefer this type of plastic to the other kind you find  in larger sets of gel pens. My kindergartner (and sometimes my toddler) likes to color with me and they like glitter gel pens. We had an incident with another brand that had a different type of casing where it leaked and created a big mess. I guess since the plastic is more “brittle”, it cracked during shipping. I don’t see that happening to the Luna Jaynes.

Speaking of coloring with young children, I liked the fact that Luna Jayne glitter pens are non-toxic.

http://amzn.to/2e6nWAm
I prefer the sturdier plastic of Luna Jayne compared to the brittle plastic of other gel pens. It comes in handy when coloring with little ones — less breakage.
  • Lastly and most importantly, they actually have glitter!

If you’re fond of adding that special touch and sparkle to your coloring pages or any crafting projects, Luna Jayne glitter pens will become one of your favorites.

http://amzn.to/2e6nWAm
Try spreading the ink while still wet and you’ll to get this fairy dust effect.

They can seem like an investment, especially if you compare prices with bigger sets of gel pens, but I say it’s worth it.

I believe Luna Jayne’s tagline is “Happiness for Your Art”. And that’s exactly what I felt after trying them. ?

http://amzn.to/2e6nWAm
I just love the glitter and sparkle of the Luna Jayne glitter gel pens!

Thank you to artist/owner Deborah Kramer for letting us try Luna Jayne. For more information, visit: https://www.facebook.com/LunaJayneArtCompany/


Maria Castro of ScriboCreative.com is a participant in the Amazon Services LLC Associates Program, an affiliate advertising program designed to provide a means for sites to earn advertising fees by advertising and linking to Amazon.com.


Coloring Black Background Coloring Pages

Do you like the dramatic effect of black background coloring pages? Then you’ll love our Color My moods series where designs are both on white and black backgrounds. You’ll get the instant visual impact without laboring hours on coloring the background black.

file3

Black background coloring books are also ideal for:
– Those who want quick coloring sessions
– Those with visual or dexterity issues since black background’s more forgiving (coloring outside the lines is not as noticeable)
– Those who just want to try something different

Below are examples from the Color My Moods Coloring Books for Adults series, as shared by talented colorists. The bottom descriptions show the coloring media/tools they used.

How about you? What’s your favorite coloring medium for black background coloring pages? We’d love to read your comments below.

And if you have colored any Color My Moods “Night” (black background) pages, join our October “Black is Back” Challenge and win a choice of your coloring medium!

Plus all the Color My Moods coloring books are now on sale for a limited time.*

*Amazon might take a while to update its prices but the CreateSpace already reflects the sale price.

Color My Moods Special BEGINNERS’ Edition 62 coloring pages – http://amzn.to/1XpSIDJ / DOUBLE SIZE 124 coloring pages – http://amzn.to/1OGl8SV

Mandalas (Vol. 1) – http://amzn.to/1VG5sGR

Garden Mandalas (Volume 2) – http://amzn.to/1VG5rms

Heart Mandalas (Volume 3) – http://amzn.to/1STo9Do

Scribo Creative Color My Moods

file1

file2

Maria Castro of ScriboCreative.com is a participant in the Amazon Services LLC Associates Program, an affiliate advertising program designed to provide a means for sites to earn advertising fees by advertising and linking to Amazon.com.

Using Black To Brighten Coloring (Pencils Over Markers Tutorial)

October is here — cooler days and longer nights (and Halloween) make us think of the color black.

We personally love the dramatic effect of black. It’s one of the reasons why all the Color My Moods Mandalas (Volumes 1-3) have designs on both white and black background.

In this tutorial, black is the star. You’ll learn how black can brighten up your coloring, and how it can enhance and make colors more vibrant.

If you enjoyed our White (After Labor Day) Challenge in September, you’ll have a lot of fun trying this black/pencils over markers technique.

Experiment with it and join our October Black is Back Challenge. You can also have fun using your neon, metallic, opaque colors on our black background pages. Details will be on the pinned post of our our Facebook page: https://www.facebook.com/ScriboCreative.

PENCILS OVER MARKERS TUTORIAL
Materials:

*Shopping links are listed at the bottom of this post for your convenience

Coloring page – The one featured here is a simple-level mandala that’s included in both Color My Moods Heart Mandalas (Vol. 3)
and the Beginners’ Edition.

Heart Mandalas (Vol. 3) has simple, medium and intricate designs while the Special Beginner’s edition is a compilation of all the simple-level mandalas from Color My Moods (Vols. 1-3):

Heart Mandalas (Vol. 3) – http://amzn.to/1STo9Do
Beginners 62 coloring pages – http://amzn.to/1XpSIDJ
Beginners DOUBLE SIZE 124 coloring pages – http://amzn.to/1OGl8SV

Markers

Colored pencils/black colored pencil

Watercolor

Sponge

White pigment pen

scribo_blackvertutmatst

Step 1: Color with markers as first layer.

scribo_blackvertut1

Step 2: Shade on top using a shade darker than the marker. In this instance, Vermailene used Carmine Red.

scribo_blackvertut2

Step 3: Layer with another darker shade, for this example, Crimson Red.

scribo_blackvertut3

Step 4: Last layer will be black to deepen the contrast.

Scribo Tutorials

Step 5: Repeat for the rest of the hearts, following the gradation of shades, layering last with black pencil.

Scribe Tutorial

Step 6: Color the rest of the image with markers.

scribo_blackvertut6

Step 7: Layer with pencils, following the principle for the hearts.

scribo_blackvertut7

Step 8: Work on the background. Wet the sponge and dip on watercolors. In this case, pink, then dab randomly on the background.

scribo_blackvertut8

Step 9: Layer with different colors of watercolors using the sponge.

scribo_blackvertut9

Step 10: Once dry, use white pigment pen and draw white circles of different sizes on the background.

scribo_blackvertut10

Here’s the finished product…

Scribe Tutorial

Another gorgeous colored page! Follow Vermailene’s beautiful works at:

Instagram: vermailenebarrios,

Facebook: https://www.facebook.com/verbarriosPH/

Shopping list:

Maria Castro of ScriboCreative.com is a participant in the Amazon Services LLC Associates Program, an affiliate advertising program designed to provide a means for sites to earn advertising fees by advertising and linking to Amazon.com.

Coloring Bookmarks Tutorial

We hope that you’ve enjoyed the recent coloring tutorials we’ve posted on using white gel pens, colored pencil and crayon for the Starry Night/Galaxy coloring technique, coloring gems and  crayon-resist method.

One more way to use white in your coloring is to add embellishments on your coloring page or craft projects with stippling, doodling or adding squiggles and similar accents.

Donna Pecoraro has created several beautiful bookmarks from the coloring bookmarks sets we have for instant download from our Gumroad store. When we saw the first set she made, we knew we had to ask her how to put a lovely project together. Here it is straight from Donna…Enjoy!

COLORING BOOKMARKS TUTORIAL:

Materials needed:

Coloring bookmarks (If you wish, you can also cut up colored pages to your desired bookmark size):

Rose – https://gum.co/jeWr

Believe – https://gum.co/mTCYG

8 – https://gum.co/uTekq

Cardstock

Glue

Scissors

Ribbon

Step 1: Begin by coloring your page. You can choose any medium. I’m doing this set for my teen daughter who loves this color combination. Here, I combined pencil, markers, and white gel pen.

Here is the completed page, ready to be crafted into bookmarks.


scribo_bookmktutstep1

Step 2: Cut out the bookmarks and mount on your choice of craft papers.

I get lots of colored cardstock from my local craft store, so I have a stash of quite a few colors that I use for card making, scrapbooking, and projects like this one.

I’ve taken a few sheets of paper out that I think might go well with the color scheme, and placed the bookmarks on them to see how the colors react to each other.

The tools you will need are simple. The key is to be as neat and precise as possible.

To cut the mounting paper, you can measure with a ruler and make a fine pencil line on the opposite of the paper so it can be erased later and won’t show.

Or, if you own a paper cutter, you can simply insert the paper, judging what amount of border you will want to leave around the bookmark.

Here are the bookmarks, all cut out and ready to be mounted.

scribo_bookmktutstep2

Using a glue stick, I’ve attached the bookmark to the mounting cardstock. Remember to leave extra space at the top of the mounting paper so that you can punch a hole for adding a ribbon if you like.

There are so many papers available, here I’m using a book of papers and picking a pinkish striped one to mount the bookmark.

Step 3: The bookmarks are all mounted, with holes punched.

A bit of ribbon threaded through the hole adds a nice touch to the bookmark. Here are some possibilities  picked out from my ribbon stash.

You can purchase narrow ribbons very cheaply from craft stores, the one on the spool was just 50 cents from Michael’s Crafts. I’m also considering using satin cording here.

scribo_bookmktutstep3

Step 4:  And here they are, completed! I knotted the satin cording to prevent unraveling and add interest. With the black cording, I knotted in some lightweight beads. Anything goes!

You can also laminate the bookmarks or even cover with clear Contact paper before adding the ribbon to make them sturdier.

Maria Castro has several sets available for every taste. They’d make a lovely party favor for a book club meeting, or a great addition to the gift of a book!

scribo_bookmktutstep4


We would like to thank Donna Pecoraro for sharing these tips with us. Want more? Make sure you subscribe to our enews for freebies, tips, coloring inspiration and exclusive deals: https://www.scribocreative.com/enews/

Don’t forget, if you use white in any of your Color My Moods coloring projects, you can join our September Challenge and have a chance to win white Gelly Roll or Uni-ball pens. Visit us on Facebook: https://www.facebook.com/ScriboCreative/posts/629300680565572:0

Enjoy your coloring bookmarks or share with family and friends!

Starry Night Tutorial

We’re big fans of Vermailene Barrios’ beautiful vibrant coloring and we’re excited that she shared her Starry Night technique to our colorists.

The coloring page featured in this tutorial will be part of our floral themed Bible-verse based coloring journal to be released in October.

This particular page will have the verse Love is patient, Love is kind. If you would like to be notified when the book is available on Amazon, email info@scribocreative.com with the subject line “Coloring Journals” [*Update: Blessings in Bloom is now available on Amazon and Gumroad: Color My Moods Blessings in Bloom Gratitude Coloring Journal – http://amzn.to/2enxOT3, PDF version on Gumroad: https://gum.co/UIehu].

In the meantime, this demo page is available on our Gumroad store for instant download: https://gum.co/tUsb.

STARRY NIGHT TUTORIAL:

For optimal results, Vermailene recommends the following materials (shopping links are listed at the bottom of this post for your convenience):

Coloring page printed on watercolor paper

Zig Kuretake Clean Color Brush Pens

Zig Detailer Watercolor Brush

Uni-ball Broad Point White Gel Pen

Uni-ball Fine Point White Gel Pen

VerTutMatSt

Step 1: Surround the flowers with the black marker.

VerTutStep1

Step 2: Apply another color next to the black marker. In this instance, Vermailene used red.

VerTutStep2

Step 3: Continue to build the colors. For this example, color in with pink then yellow.

VerTutStep3

Step 4: Mix the colors with the water brush.

Step 5: Use the white broad and smaller tip gel pens for the stars. “Dot” the stars all over and even add some sparkly ones like what Vermailene did in the example.

You now have a breathtaking “Starry Night” background! Follow Vermailene’s beautiful art at:

Instagram: vermailenebarrios

Facebook: https://www.facebook.com/verbarriosPH/

VerTutStep4

Products used for this tutorial:

Maria Castro of ScriboCreative.com is a participant in the Amazon Services LLC Associates Program, an affiliate advertising program designed to provide a means for sites to earn advertising fees by advertising and linking to Amazon.com.